Official postWritten by noted.do itself — a notice, a rule change or an announcement.An official guide from noted.do.
Publishing from Standard Notes
Your blog is already made. This page shows how to send a note to it, with a picture of every step. It takes about five minutes, once.
If you'd rather not use Standard Notes at all, you don't have to: write a post on this site instead. Everything below is for people who want to write in their own notes app and publish from there.
What you need
- Standard Notes on a computer, from standardnotes.com. The plugin runs on the desktop and web apps; you can read and edit on your phone, but the Publish button lives on the bigger screens.
- Your publishing token, from your account page. It's a long line of letters and numbers.
1. Open Preferences
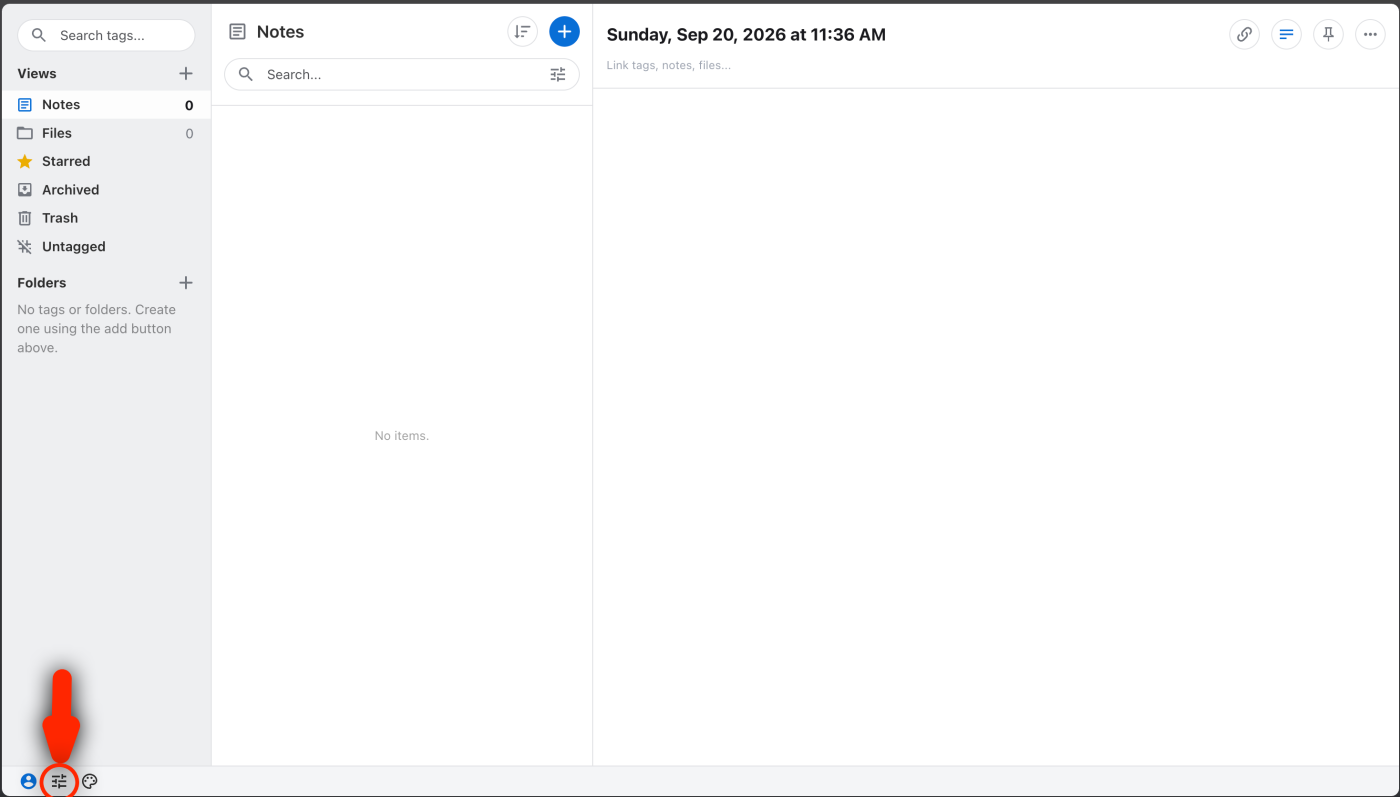
In Standard Notes, press the sliders icon in the bottom-left corner.
2. Go to Plugins and scroll to the bottom
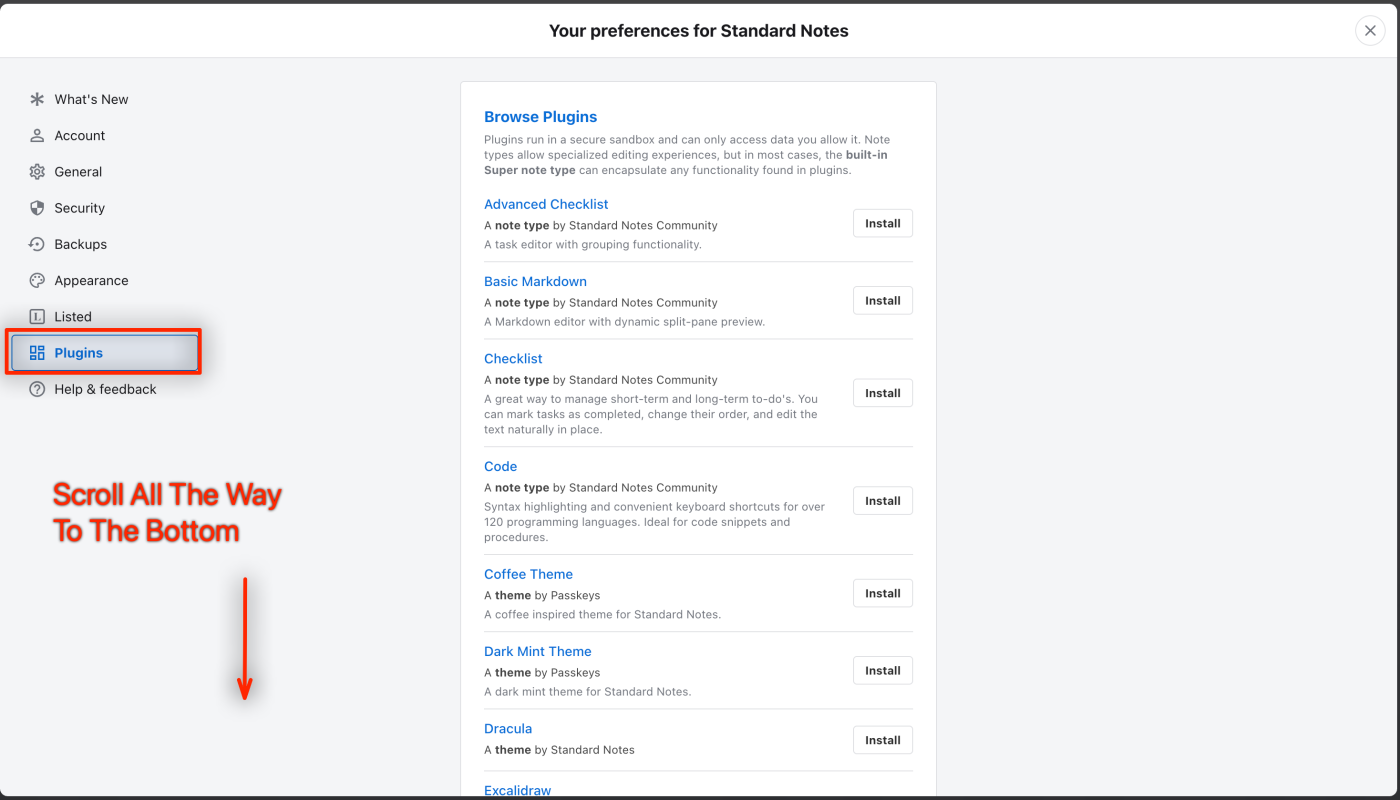
Choose Plugins in the list on the left, then scroll all the way down, past the plugins Standard Notes offers.
3. Paste the address and press Install
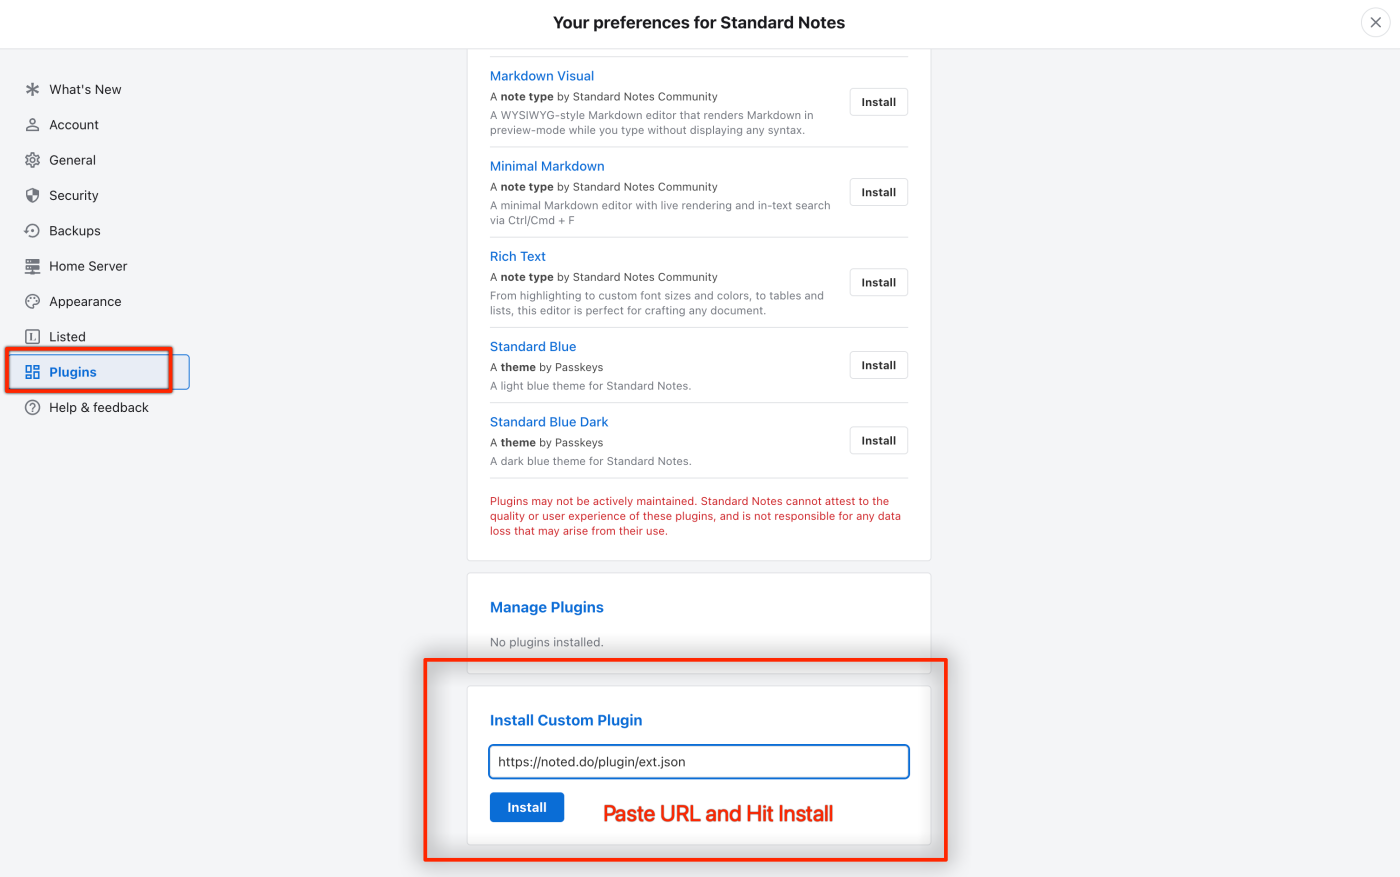
At the very bottom is Install Custom Plugin. Paste this address into the box and press Install:
https://noted.do/plugin/ext.json
4. Confirm
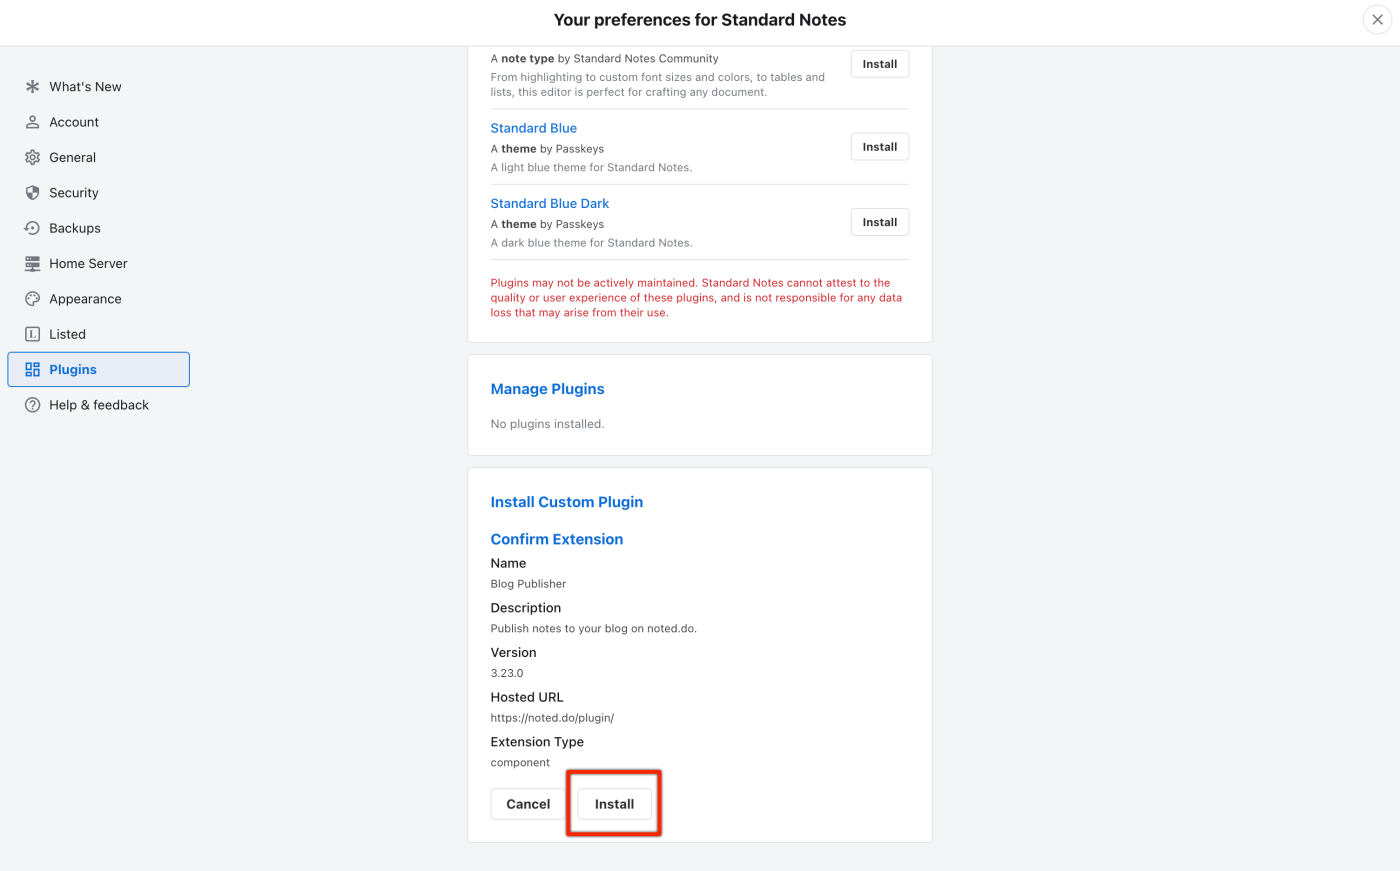
Standard Notes shows what it's about to install: Blog Publisher, hosted at https://noted.do. Press Install again.
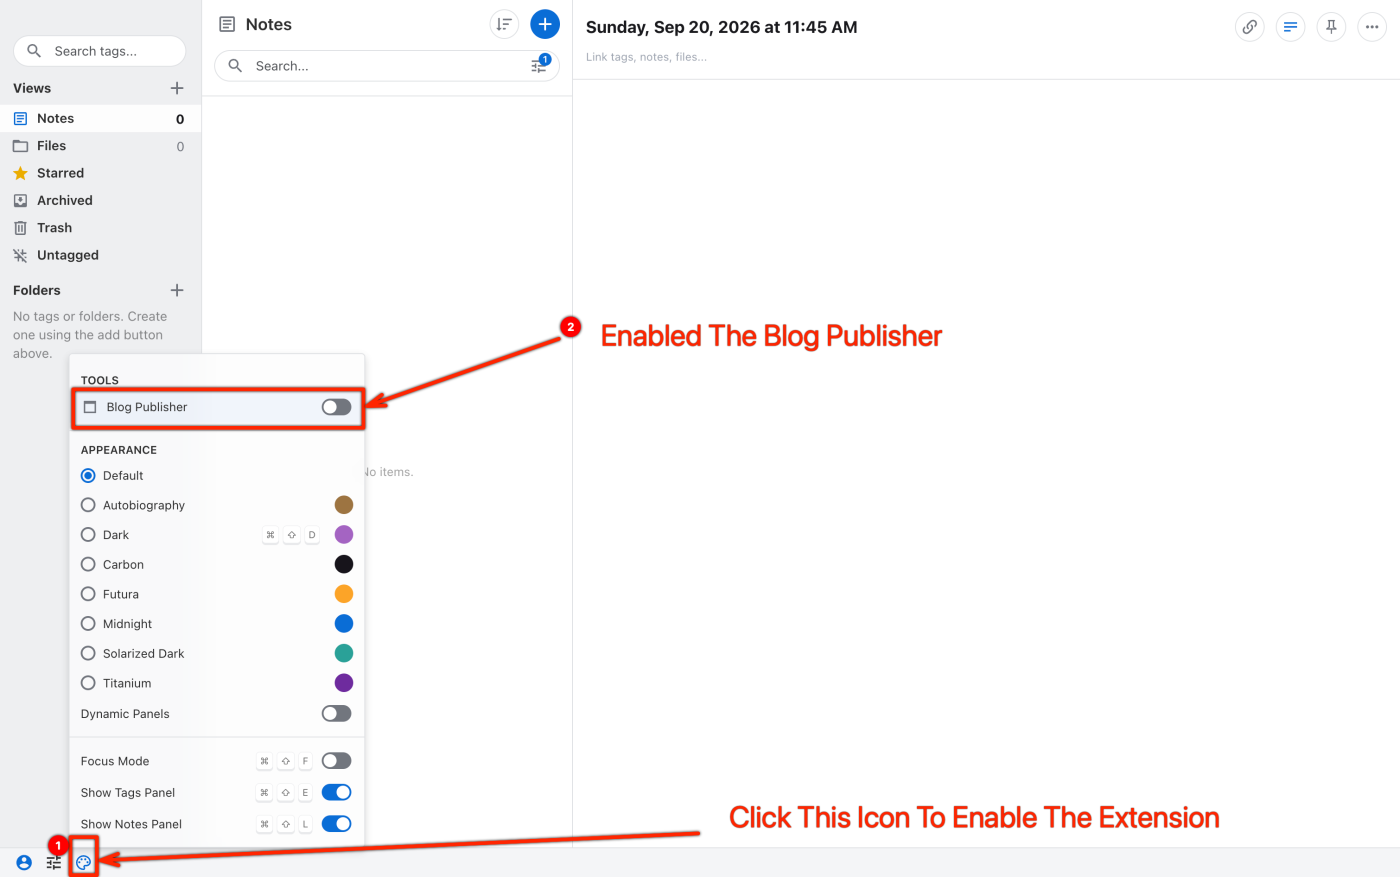
5. Switch it on
Press the palette icon at the bottom-left, and under Tools turn on Blog Publisher.
6. Connect it to your blog
The Blog Publisher bar now appears under your note. Press the gear on the right, paste your token from your account page, and press Connect.
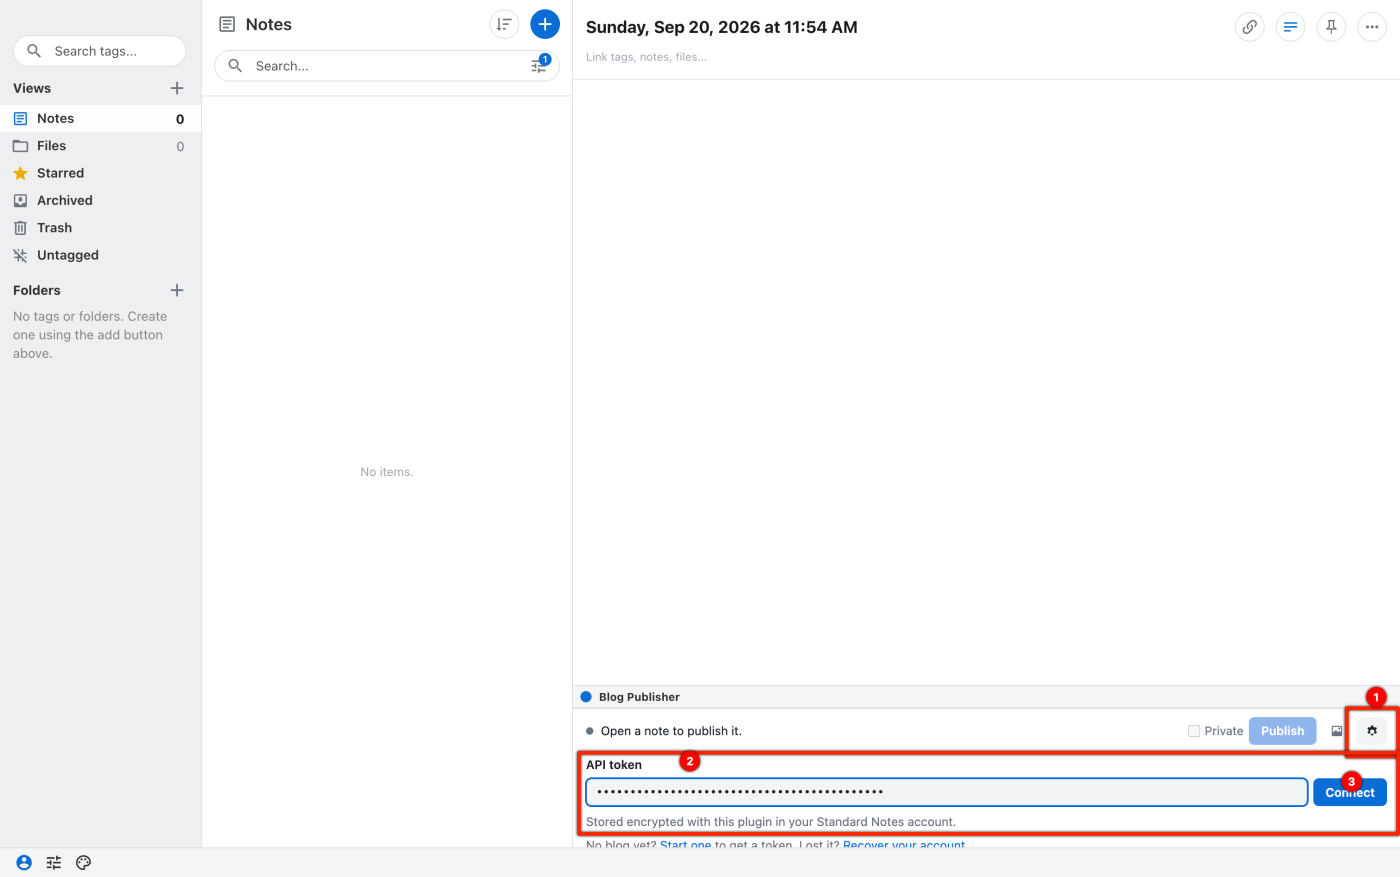
Your token is like a password. Don't paste it anywhere else, and if you ever think someone has it, make a new one on your account page — the old one stops working straight away.
7. Publish
Write a note as usual. The first line becomes the title. Press Publish in the bar at the bottom.
Once it's published, the bar shows View post, Unpublish and Update post. Tick Private before publishing to keep a post off your blog and behind a secret link.
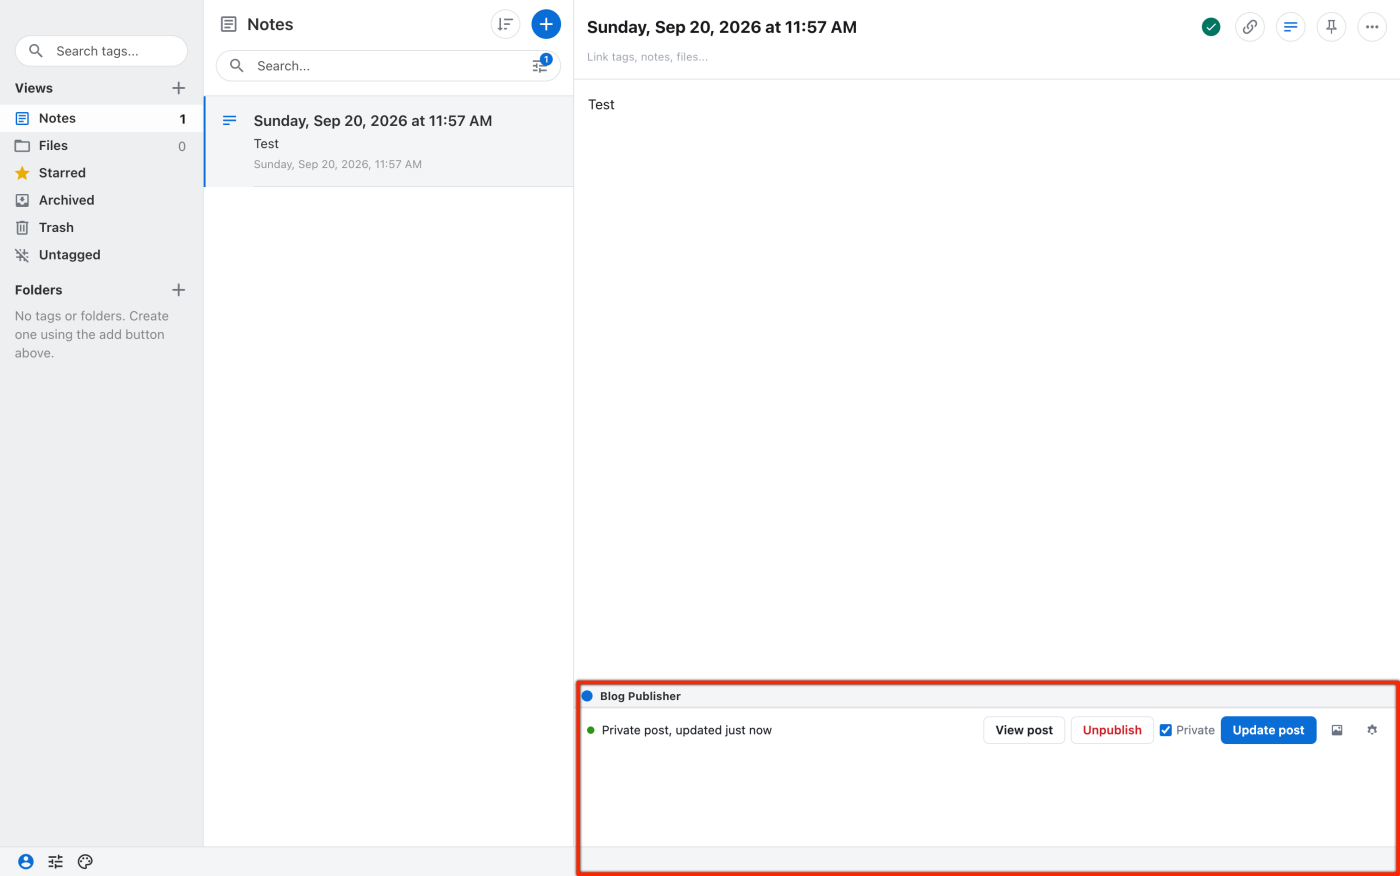
Edit the note and press Update post whenever you change it. Your notes stay in Standard Notes, encrypted as always.
Things worth knowing
- Your first line is the title. The rest is the post.
- Markdown works:
**bold**,_italic_,# headings, lists, quotes, links and code. See the formatting guide. - Pictures: press the picture icon in the plugin bar, or upload from your account, and paste the line it gives you into the note.
- Drafts, private posts and scheduling: the gear in the plugin bar has the options.
- Pages (About, Contact) and other settings come from a few lines at the top of a note — the formatting guide explains those.
If something isn't working
- "Not connected" or a token error: make a new token on your account page and paste it in again.
- No bar under the note: go back to step 5 and check Blog Publisher is switched on.
- The plugin won't install: check the address has no spaces, and that you're on the desktop or web app rather than a phone.
- Still stuck? Write to admin@noted.do and say what you tried.